Configuration of the DNS integrated with the AD DS
Now we have
to configure the DNS Server because it is integrated with the AD DS. It is more
secure then a separate DNS server. So let’s start to configure the DNS server:
Go to server manager window and click on Tools in the left corner of the server
manager window as shown in the following Figure 35.
Figure 35
Click on the
Tools and then click DNS from the list. As you click on the DNS you will see
the DNS Manger window as shown in the following Figure 36.
Figure 36
Select the
server name and expend it. As shown in the following Figure 37.
Figure 37
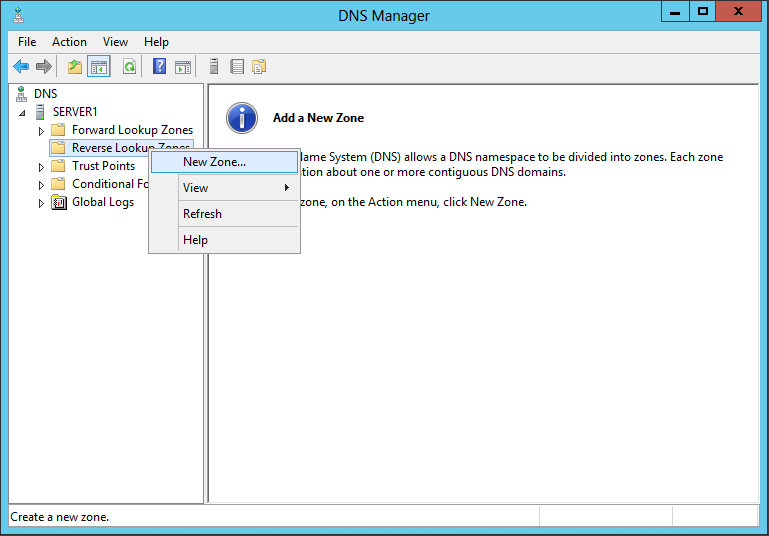
Select the
Reverse Lookup Zone and right click > New Zone as shown in the following Figure
38.
Figure 38
Whenever you will click on the new zone a wizard will open and follow the steps. When you will finish the wizard then you have to make a host a record in forward lookup zone with associated it's PTR record. Now your DNS is ready to work or it will work fine.
Happy Learning


Comments
Post a Comment